Getting Started
In-Lab Pooled Testing
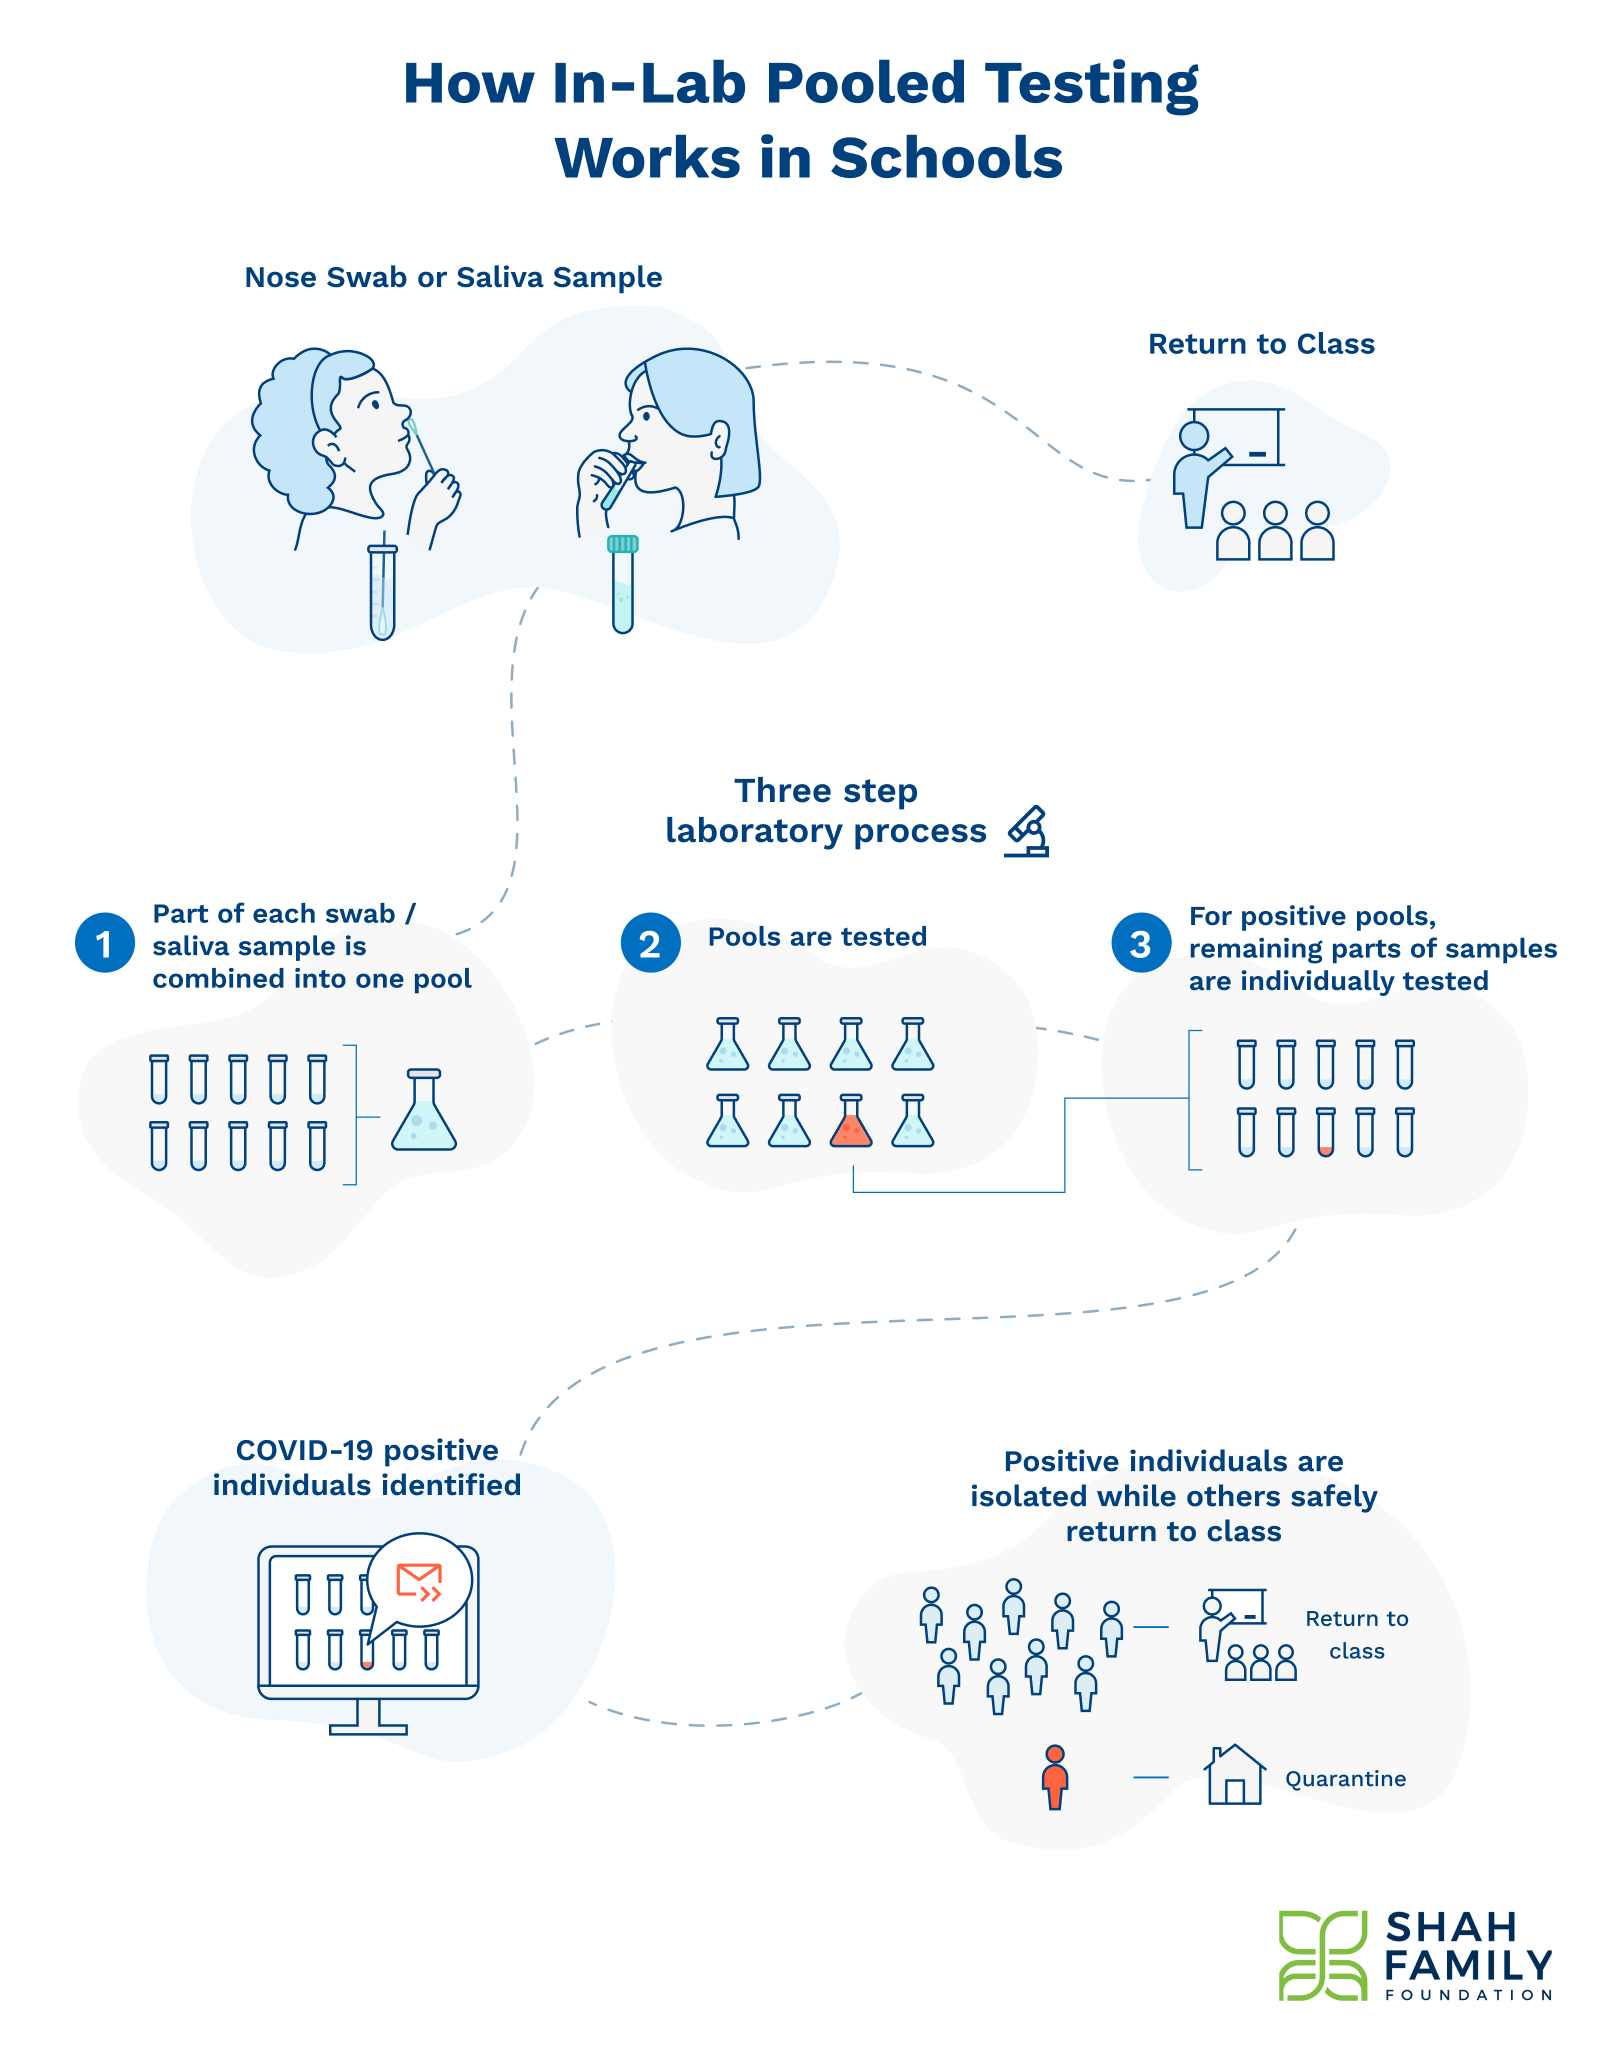
The templates and tools in this section apply to school testing programs where swabs or saliva samples are collected individually and sent to the lab, where they are tested as a pool. The lab has the capacity to retest any positive pool to identify the COVID-positive individual(s).
In-lab testing programs are great choices for some schools and child care programs.
What you can find here…
Click to jump to each section about:
Getting Started Checklist
Click here to download our Getting Started Checklist
Vendor Selection:
Determine who you will be testing: how many people, what ages, what are consent requirements, where will testing take place (at-home or at-school)
Schedule calls with 1-3 vendors to discuss the right program for your school
Sign contracts and onboard vendors. Use vendor checklist to help vet vendors!
Leads and Training
Identify Testing Team for district or program (See Identifying Your Testing Team)
Complete trainings from testing service provider
Software and Regulatory Onboarding
Decide who will manage the consenting and outreach for each school or childcare program, and how consents will be grouped
Complete software onboarding and trainings with testing service provider
Testing Logistics and Supplies
Determine target start date and ensure testing vendor is aware of timeline
Confirm process for handling positive individuals
Confirm contact tracing process
Confirm school or childcare center communications plan
Establish and document testing schedule (be sure to check with your vendor before setting your testing day)
Document how you will collect saliva samples or swabs (at home or at school)
Identify testing area(s) or sample drop points at each school
Confirm process for transporting pools to the lab
Distribute PPE and testing supplies to each school (surgical and N95 masks, eye protection, gloves, gown, hand sanitizer, sanitizing wipes, tissues)
Communications & Consent (See our Communications toolkit)
Create your Three Phase Communications Plan
Schedule initial introductory webinars for school staff & community
Post-Implementation Support
Check out our Peer-to-Peer hub to connect with other schools
Join our virtual pooled testing learning community on facebook.
Monitoring Case Rates
Identify process for monitoring positivity rate on a weekly basis and taking necessary actions to protect the school community
The Shah Family Foundation is available to work with your district one-on-one basis to support your pooled testing program. Email us at CovidEdTesting@shahfoundation.org
Identifying your
Testing Team
To support your testing program, it’s important to identify internal, external, or volunteer resources that can take on the responsibilities required for a testing program. One individual can take on multiple roles, and in many cases this is recommended. While school nurses tend to make great candidates, a nursing degree or specialized medical training is not necessary to fulfill any of these roles.
Staffing your Testing Team in School Settings
Please view our Identifying Your Testing Team Guide: In-Lab Pooled Testing for detailed descriptions of each role.
At each school district, you need:
Testing Program Manager
At each school, you need:
Testing Coordinator & Software Manager
Pooled Test Observer & Swabber
Staffing your Testing Team in Childcare Settings
Given that early education programs are generally smaller than school districts, we recommend the following staffing model.
You will need the following:
Program administrator(s)
Designing testing schedule and communicating to staff and families
Oversees the testing program and performs a liaison role to vendors, testing team and staff
Also receives the pool results for the program through the vendor’s portal software
We recommend keeping the number of administrators between 1-4 people per site, depending on the size of the program / site
Testing coordinator(s)
Oversees the testing process at a specific site, including scheduling, setup, logistics, communication and volunteer management
On the day of testing, collect samples, record them and drop off at specified location for delivery to lab
Note. This person does not receive results or access to the vendor portal and can, therefore, be a volunteer
Setting Your Testing Schedule
Consistency and predictability is important in a testing program. First, your participants will find it easier to prepare for testing if it happens at the same place, same day and same time every week. Second, maintaining a consistent schedule means that your participants will receive results on a regular basis, lowering the likelihood that an infection will go undetected.
Be sure to check with your testing service provider as they may have preferences for which days you test. For example, with Veritas, each program and site will be assigned a weekly testing day (typically either Tuesdays or Wednesdays). This avoids conflicts with Monday holidays and increases the likelihood that participants will receive results during the same week.
A few helpful things to keep in mind when setting your testing schedule:
If a test is not authorized for at-home use, any trained staff member can administer or observe the test; it does not need to be administered by a healthcare professional. Students in grades 2 and above and adults can swab themselves under observation
If a test is authorized for at-home use, it can be done at home and parents/guardians can support young children with swabbing or saliva sample collection
Anyone outside of the household observing a student or staff member self-administering the test should maintain a six-foot distance and wear a face mask and gloves. Anyone administering the test for a student should wear an N95, gown, gloves, and protective eyewear
Testing is quick! It takes less than 30 seconds per person
Turnaround time for pooled test results is 24-36 hours from when samples arrive at the lab. Your testing service provider can provide more specifics
According to the Department of Health and Human Services, individuals in positive pools may maintain their regular schedules, while awaiting individual diagnostic results (DESE FAQ, see question #39)
A Week In the Life: In-Lab Pooled Testing in Childcare

Based on a Project by Neighborhood Villages
Prepared by COVID-19 Response Advisors
A few helpful things to keep in mind when setting your testing schedule:

Based on a project by Wellesley Public Schools
Prepared by COVID-19 Response Advisors
Choosing Swab or Saliva Sample Collection Methods
There are two primary collection methods:
Anterior nasal swab (“short swab”) that is quick, easy, and painless to administer. This is a gentle, lower-nostril swab – it is not the deep brain-poking swab. Swabbing is quick! It only takes a few seconds per student. Many districts report they can collect swabs from a whole class in just a few minutes.
Saliva samples are spit samples dribbled into a tube via a straw or funnel. They are non-invasive and easy to use for all ages - though some of the youngest children have trouble generating saliva on command!
On-Site Collection vs. At-Home Collection
Some testing vendors offer the possibility of at-home collection. Whether or not this is an option depends on which test they use and whether the collection kit is authorized by the FDA for at-home collection.
At-home collection can be a great option to minimize the need for school personnel to participate in the collection process and limit loss of instruction time. However, it can decrease participation rates as you must depend on students, staff, and families remembering to bring their swabs or saliva samples on each testing day.
At-School Collection: Nasal Swabs
Grades 1 & under & students with disabilities: staff member swabs
Students grade 1 and below and some students with disabilities will have their noses swabbed by a trained staff member. It is recommended that staff doing the swab collection have an N95 or higher respirator, eye protection, gloves, and a gown. Download
Click here to view our Swab Collection Best Practices for Young Learners and Students with Disabilities.
Grades 2-12 & staff: Self-Swab
Adults and students grade 2 and above can swab their own noses under observation by a trained staff member. Staff observing self-collection should wear a surgical mask and maintain six feet of distance. There are different models for how to organize swab collection. Many districts use multiple models depending on schedules, school setup, and age / abilities of students.
At-School Collection: Saliva Samples
Consider scheduling sample collection for first thing in the morning.
Individuals should not eat, drink, smoke, vape or brush teeth within 30 minutes of providing saliva samples.
They should not use mouthwash within 2 hours of sample collection.
For older kids and adults, generating saliva can be a messy and at times embarrassing process. Make sure you have a semi-private spot for individuals to collect their saliva samples.
The following may help increase saliva production:
Gently rubbing the outside of cheeks
Making chewing motions with mouth
Smelling or imagining sour foods such as lemons
Thinking about favorite foods
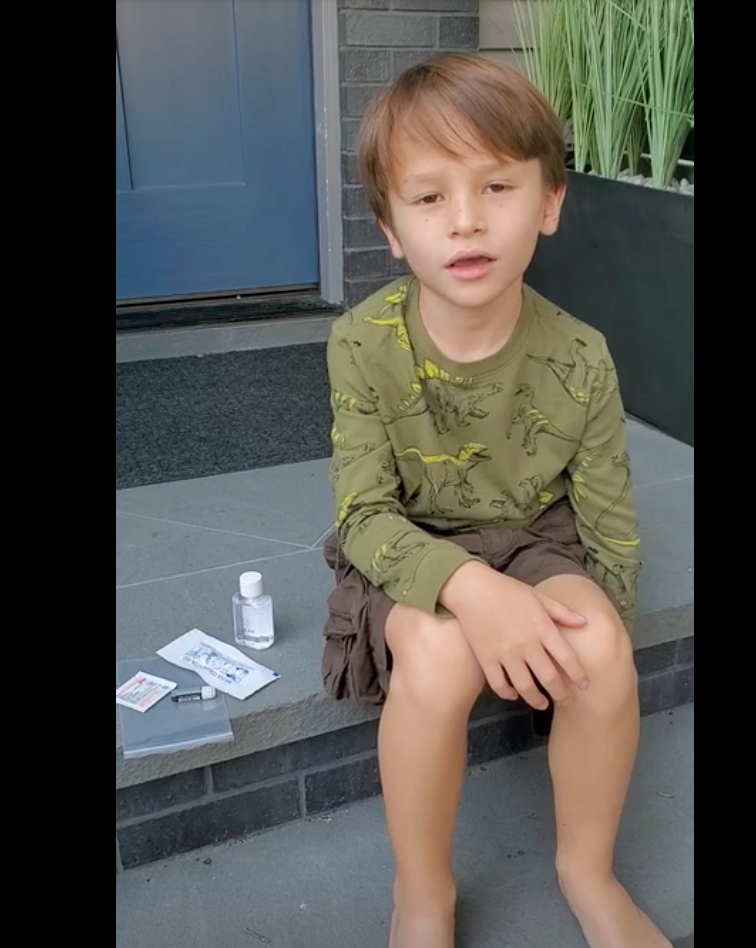
At-Home Collection: Saliva Samples
Some testing service providers have tests that allow for at home collection, which can be a great option for some schools and communities.
Click image below view video instructions on how to collect a saliva sample.
Keeping School Personnel Safe During Testing
Anterior nasal swabs and saliva tests are not considered to be aerosol generating procedures, but PPE is recommended for people administering or observing the tests simply because, at times, they need to be close to the individual being tested.
In this section we describe the types of PPE recommended for personnel involved in testing.
Personnel actively collecting swabs:
Fitted* N95 or higher respirator (though a surgical mask can be used if a N95 is not available)
Eye protection
Gloves
Gown
*during the public health emergency, and with the wide variety of N95 respirators in use, it is not always possible to perform fit testing. Nurses and health care staff are encouraged to conduct a user seal check to determine if the respirator is being properly worn and should be performed with each use. The user seal check procedure is described here.
Personnel observing swab collection
Surgical mask
Gloves
All personnel and students should maintain 6 feet of distance and wear masks during swab collection. Any and all staff who are not actively involved in testing should maintain 6 ft of distance and wear masks.
Getting Your Pools To The Lab
All pooled tests must be sent to a testing lab for analysis. Below are the processes for some of the vendors working with schools in Massachusetts. This page will be updated as more vendors join the program.
For schools working with Veritas, via Neighborhood Villages
Lab is located in Danvers, Massachusetts
Once testing is complete for the day, place all samples in biohazard bags, with no more than 10 sample vials per bag
Transport these biohazard bags to your identified hub site and leave them in the designated collection receptacle
A courier will transport the samples directly to the lab
For schools working with Mirimus
Lab is located in Brooklyn, NY
Put up to 24 tubes in a provided biohazard bag. Pack multiple biohazard bags into prepaid fedex envelope/box.
Drop at fedex drop box or go to location. Make sure Fedex location takes biohazard shipping & be sure to check timing for overnight shipping
For schools working with JCM Analytics
Multiple labs, please ask JCMA for the specific address
Put individual samples into biohazard bags (no limit or requirement to organize by pools) and biohazard bag(s) into prepaid FedEx envelope/box
Drop at fedex drop box or go to location. Make sure Fedex location takes biohazard shipping & be sure to check timing for overnight shipping
Identifying and Isolating Positive Cases
It’s tempting to view finding a positive case as a failure. That is NOT the case. Finding a positive case means your testing program is working. Isolating that positive case means that you have made your school safer for everyone.
See our section on Communicating about Positive Cases for details about how to handle this stage in the process.
If the pool result is positive, that means that at least one of the people in that pool has detectable amounts of the COVID-19 virus in their sample and the individual samples that made up the positive pool will now be retested by the lab.
In-lab pooled testing service providers manage the notifications between a positive pool result and individual results in various ways. Some will notify a program or an individual when they are part of a positive pool, some may notify once they’ve narrowed it to a positive pair, and others may not notify until there is an individual diagnostic test result.
All individual diagnostic results should be reported by the testing service provider to:
The school
The individual
Public health authorities
See the following section on Close Contacts and Other Public Health Guidance to determine how to manage positive pools and positive individuals.
Individuals who have a positive result on an individual test will need to be isolated as defined in the DESE Protocols for Responding to COVID-19.
Example:
Veritas Pooled Testing, via Neighborhood Villages
STEP 1: Positive Pool Notification
Program Administrators receive notification that there is a positive pool
STEP 2: Reflex or follow-up testing at the lab
The lab begins to individually retest each sample
STEP 3: Notification to set up account
After a few hours, individuals within the positive pool will receive a notification email that a portal site has been created for them.
STEP 4: Individual result
Each of the individuals in the positive pool can log onto their portal site, click on the link for COVID-19 report, and view a pdf with their individual test result.
STEP 5: Notification
Upon receiving individual results, each individual should notify their supervisor and program administrator of their result so proper protocol can be taken to isolate the individual and notify close contacts.
Close Contacts and Other Public Health Guidance
For Early Education Providers in Massachusetts, please refer to the COVID-19 Child Care Playbook from the Massachusetts Department of Early Education and Care for specific public health guidance for your COVID-19 testing program.
In Between a Positive Pool Result and an Individual Positive
Students who are part of a positive pool do not need to quarantine while they await their follow-up test results, unless they are symptomatic. Symptomatic students should follow the DESE Protocols for Responding to COVID-19. If not symptomatic, individuals in a positive pool will often return to school for follow-up testing. These individuals do not have to quarantine and can ride on buses or take their normal transportation method to school, as long as they are not symptomatic.
Individuals who receive positive, follow-up individual test results will need to be isolated as defined in the DESE Protocols for Responding to COVID-19.
For details on how to communicate with individuals in a positive pool, please see our section on Communicating about Positive Cases.
Contact Tracing
There are many different models for contact tracing being deployed in Massachusetts schools. It is important to be in close contact with your local board of health to determine what role the school will play vs. the local board of health. Statewide contact tracing resources are also available via the Massachusetts Community Tracing Collaborative will reach out to provide support to those individuals, work to identify close contacts, and reach out to them. When talking with your local board of health, you can reference various resources including from the Massachusetts Department of Public Health and the Massachusetts Association of Health Boards.
Defining Close Contacts
The Massachusetts Department of Public Health defines close contacts as
Being within 6 feet of a COVID-19 case (someone who has tested positive) for a cumulative total of 10-15 minutes during a day while the person was infectious.
Infectious period – Symptomatic Individual: Begins 48 hours prior to symptom onset, and while they were symptomatic
Infectious period – Asymptomatic Individual: Begins 48 hours prior to the collection of their positive test,* until anytime in the 10 days after the test.
Having direct contact with infectious secretions of a COVID-19 case while not wearing PPE.
Being in the same room as an individual if you are consistently separated by 6 feet of distance does not meet the definition of a close contact.
*The date of the pooled test should be used to determine the beginning of the infectious period.
As a reminder, in many cases - local Boards of Health and the Massachusetts Community Tracing Collaborative (CTC) are responsible for contacting individuals that test positive for COVID-19 and their close contacts.
Quarantining Close Contacts
Local boards of health are best positioned to provide advice on quarantine requirements for individual cases. The CDC suggests that close contacts quarantine for:
With testing: At least 7 days, provided that all of the following are satisfied: they are tested (PCR or antigen) on day 5 or later from their last exposure to the positive individual and receive a negative result, they have not experienced any symptoms, and they conduct active monitoring for symptoms through day 14. CDC estimates that this strategy is 95% effective.
Without testing: At least 10 days, provided that all of the following are satisfied: they have not experienced any symptoms and they conduct active symptom monitoring through day 14.
With symptoms OR without symptom monitoring: At least 14 days. This applies to anyone who has experienced symptoms, even if they have a negative test, and to those who are unable to conduct active symptom monitoring
Returning To School After a Positive COVID-19 Test
When individuals exit quarantine, they must continue masking and complying with other safety measures. If a student or staff member has a positive test result, they will need to stay in self-isolation for at least 10 days and until at least 24 hours have passed with no fever and improvement in symptoms, without the use of fever reducing medications.
Getting Started Templates and Examples
SOPs, Best Practices, and Schedule Plans for Swab Collection
Template:
Guide: Follow-Up Testing Guide
Case Study: Case study: Watertown Public Schools